
Untuk mengatur template, Pengguna perlu terlebih dahulu mengatur kategori template karena diperlukan selama pembuatan template
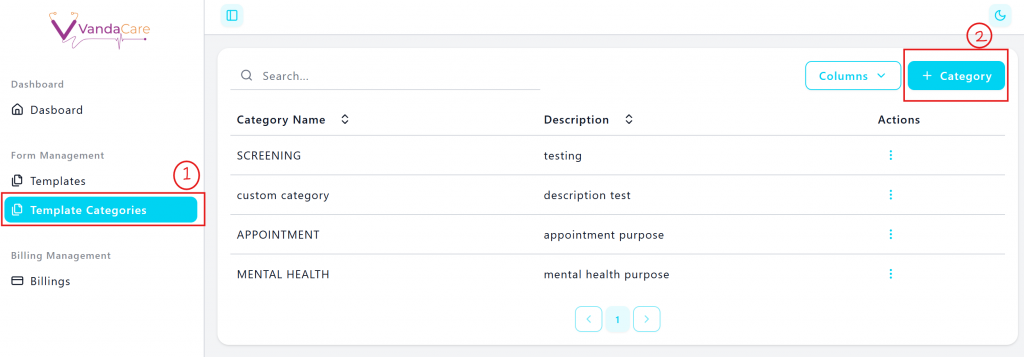
1. Klik “kategori template” di bawah Manajemen Formulir. Daftar kategori akan muncul dengan fitur pencarian dan pemilihan kolom.
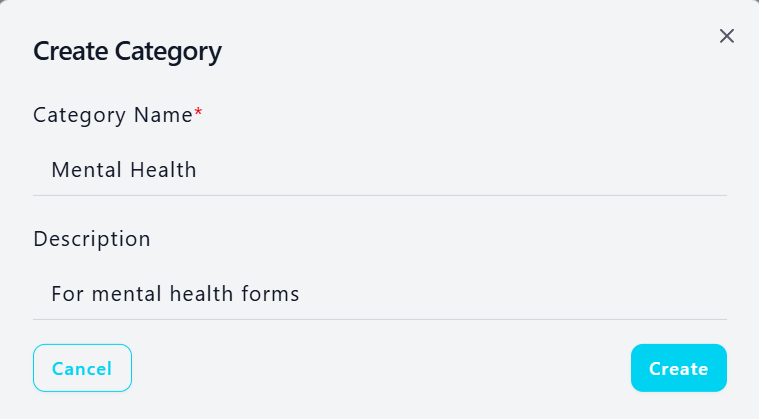
2. Klik "+ Kategori" untuk menambahkan kategori baru. Isi nama dan deskripsi, lalu klik "Buat".
Pembuatan Template
Untuk membuat templat:
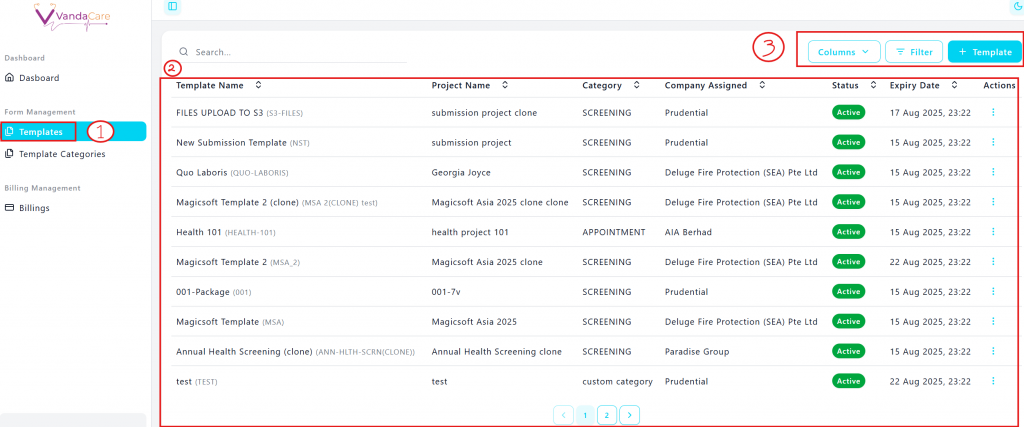
1. Klik “Template” di bawah Manajemen Formulir
2. Daftar templat yang ada akan muncul. Pengguna dapat mengurutkan templat berdasarkan tajuk kolom. Fitur pencarian tersedia di bagian atas halaman untuk mencari formulir tertentu.
3. Di kanan atas halaman, pengguna dapat mengelola kolom yang akan dilihat, mengaktifkan fungsi filter, dan menambahkan templat baru.
Tombol tindakan di halaman daftar templat memungkinkan pengguna untuk melakukan tindakan berikut:
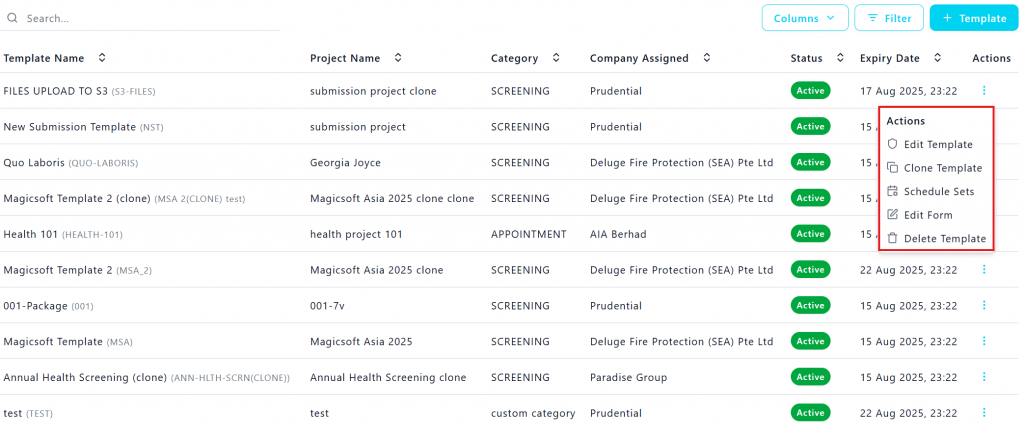
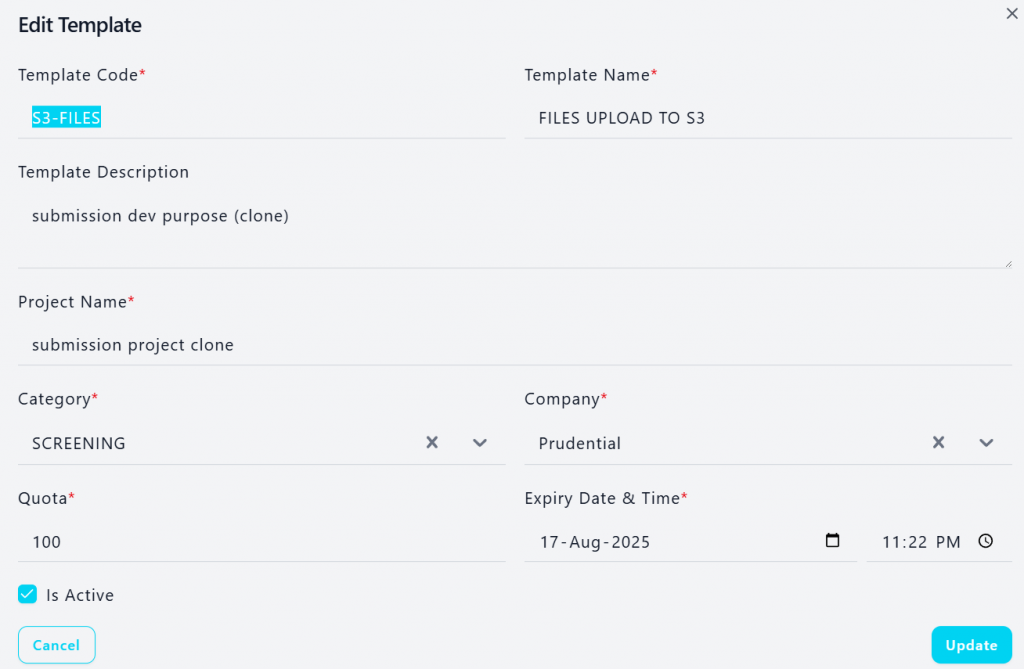
1. Buat/Edit Template:
Pengguna dapat mengelola detail templat di layar berikut. Pengguna perlu memperhatikan informasi penting seperti:
- Pemilihan kategori formulir (dibuat pada langkah pertama)
- Pemilihan perusahaan karena ini akan menetapkan formulir ke perusahaan tertentu
- Tanggal dan waktu kedaluwarsa karena ini akan memengaruhi ketersediaan formulir.
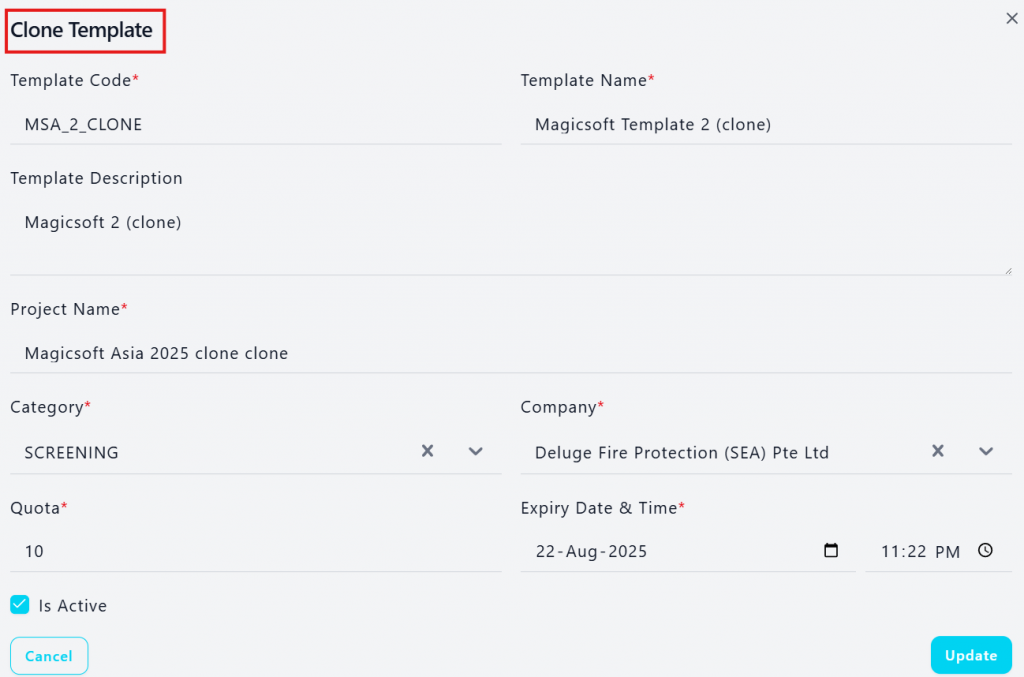
2. Kloning Template
Kloning templat memungkinkan pengguna membuat salinan templat yang identik. Dengan memilih opsi ini, pengguna dapat mengubah informasi templat dari templat yang diduplikasi sebelum mengedit pertanyaan formulir.
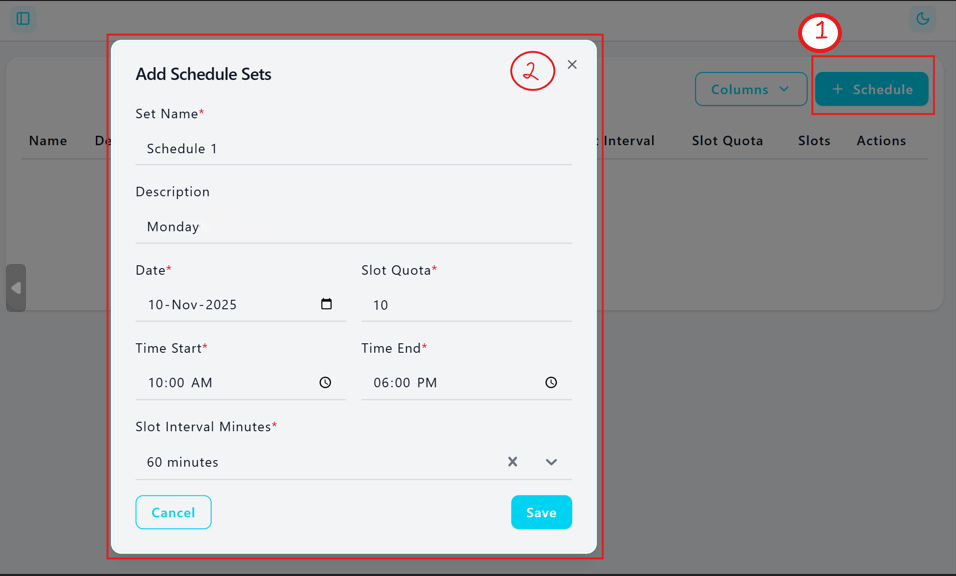
3. Set Jadwal
Rangkaian jadwal memungkinkan pengguna untuk mengatur waktu janji temu yang relevan dengan formulir. Setelah pengguna mengklik "rangkaian jadwal", daftar jadwal yang ada akan ditampilkan.
3.1. Pengguna dapat mengklik “+ Jadwal” di kanan atas halaman untuk menambahkan jadwal baru
3.2. Pengguna dapat mengisi informasi pada gambar berikut untuk mengatur jadwal janji temu. Harap dicatat bahwa menit interval slot akan dibuat secara otomatis oleh sistem untuk memastikan slot waktu dibuat secara merata antara waktu mulai dan berakhir.
4. Edit Formulir
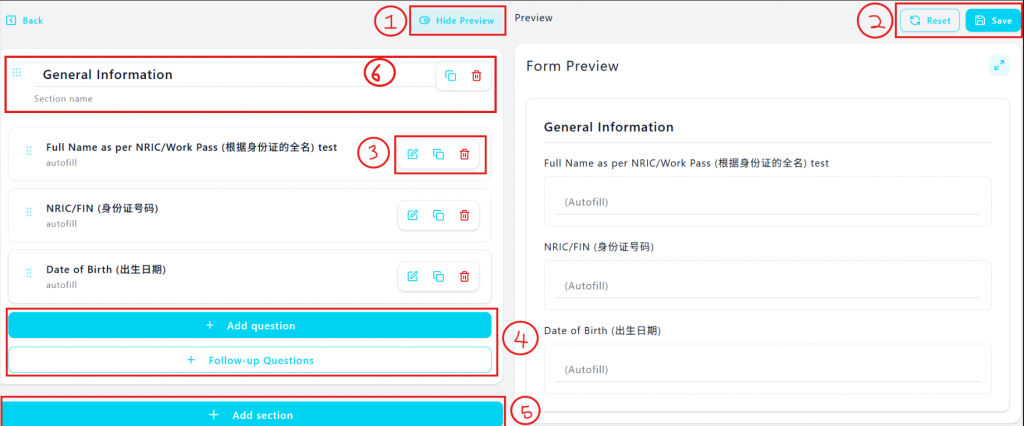
Segmen ini memungkinkan pengguna untuk menyusun formulir berdasarkan pertanyaan yang mereka butuhkan. Setelah dipilih, pengguna akan masuk ke formulir dengan beberapa bagian umum yang telah diatur dan pratinjau formulir akan diaktifkan. 4.1 Pengguna dapat mengaktifkan "Sembunyikan pratinjau" untuk menutup pratinjau formulir.
4.2 Pengguna dapat memilih "Reset" untuk menghapus semua perubahan yang dibuat pada formulir sebelum menyimpan. Pengguna dapat memilih "Simpan" untuk menyelesaikan pengeditan formulir.
4.3 Setiap pertanyaan akan memiliki 3 tombol tindakan, dimulai dari kiri – Edit (pengeditan pertanyaan), Duplikat pertanyaan, dan Hapus pertanyaan.
4.4 Pengguna dapat menambahkan pertanyaan baru atau menambahkan pertanyaan lanjutan (mengatur dependensi)
Pertanyaan Baru
Saat membuat atau mengedit pertanyaan baru:
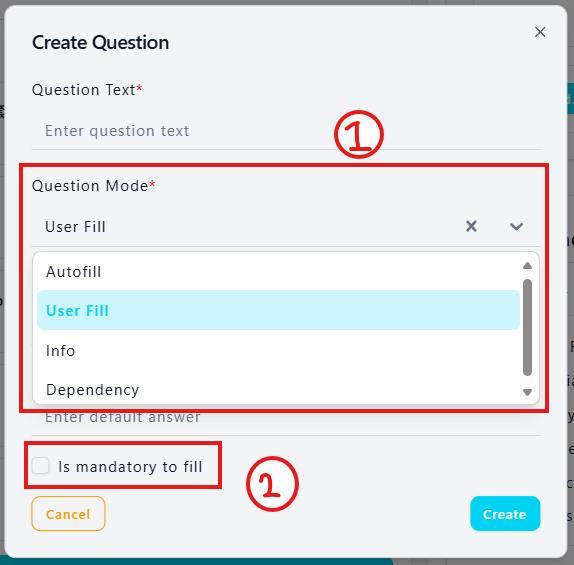
1. Pengguna akan diminta untuk memilih mode pertanyaan berikut:
- Isi otomatis
- Bidang pengguna
- Informasi
- Ketergantungan
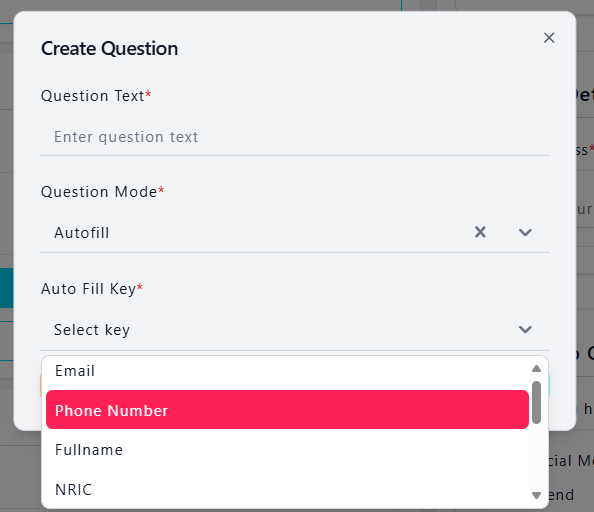
Pengisian otomatis akan secara otomatis mengambil data dari informasi pasien yang ada seperti:
- Surel
- Nomor telepon
- Nama Lengkap
- NRIC
- Tanggal Lahir
- Perusahaan
- Jenis kelamin
- Kebiasaan merokok
- Kebiasaan minum alkohol

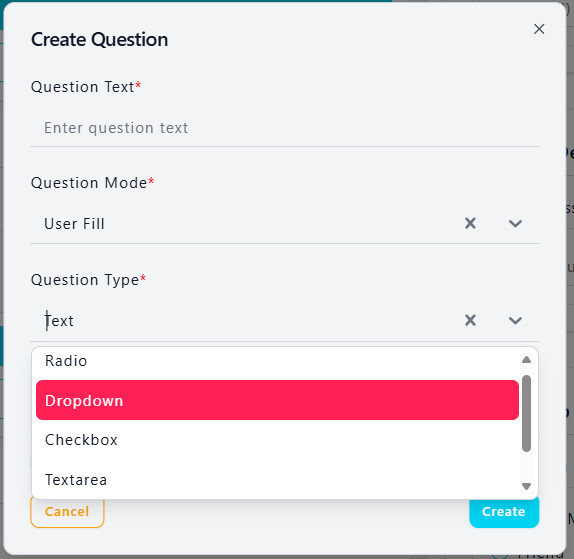
Pengisian pengguna adalah pertanyaan yang mengharuskan pasien untuk mengisi jawabannya secara manual.
Pengguna akan diminta untuk memilih jenis pertanyaan yang meliputi:
- Radio (1 jawaban saja)
- Kotak centang (beberapa jawaban)
- Area Teks (Jawaban panjang)
- Teks (Jawaban singkat)
Perlu diperhatikan bahwa untuk jenis pertanyaan radio & kotak centang, pengguna akan diminta untuk mengatur pilihan jawaban.
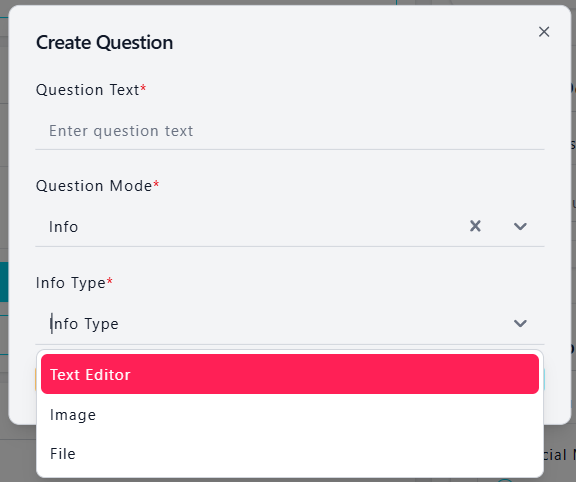
Pertanyaan tipe info tidak memerlukan masukan apa pun dari pasien.
Pengguna dapat berbagi informasi dengan pasien mereka melalui jenis pertanyaan ini. Pengguna dapat memilih untuk berbagi:
- Teks
- Media
- Mengajukan
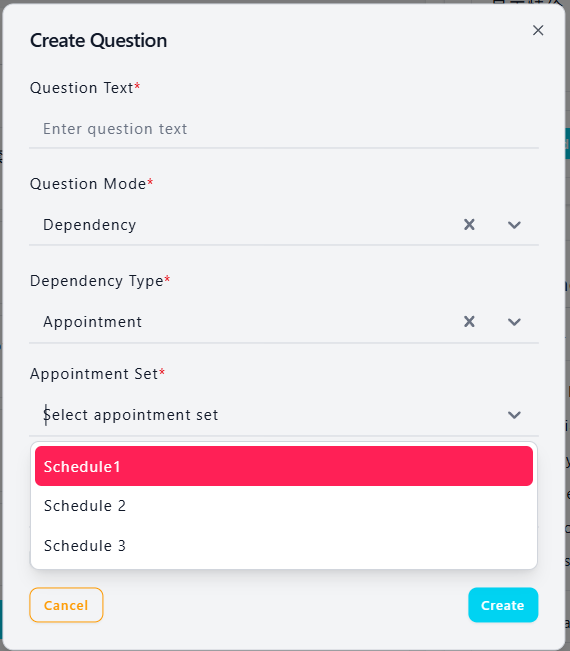
Pertanyaan jenis ketergantungan saat ini hanya berlaku untuk janji temu.
Pengguna akan diminta untuk memilih jenis ketergantungan: janji temu diikuti dengan memilih “Set Janji Temu”.
*Jika Anda tidak melihat opsi apa pun di sini, Anda perlu menuju ke “jadwalkan set” untuk mengatur periode janji temu
Pertanyaan Lanjutan (format bersyarat)
Saat ini format bersyarat berlaku untuk jenis pertanyaan yang diisi Pengguna – Radio.
Penting untuk membuat pertanyaan lanjutan sebelum mencoba menetapkan pertanyaan lanjutan.
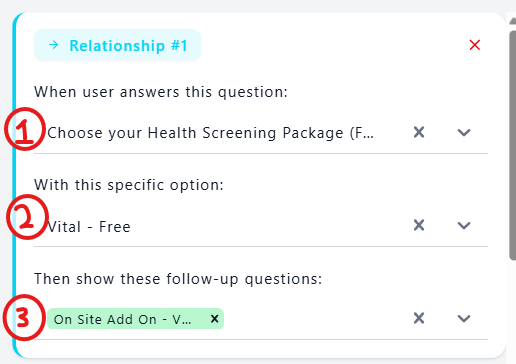
1. Pengguna perlu memilih pertanyaan mana yang dijawab
2. Diikuti dengan jawaban yang dipilih
3. Pertanyaan lanjutan manakah yang akan dipicu.